4. Automating PowerShell Scripts - Powershell
4.2 Running PowerShell Scripts with Task Scheduler
Overview
Windows Task Scheduler is a powerful tool that allows you to automate script execution, program launches, and system monitoring. This guide will walk you through creating a scheduled task that monitors software installations and sends email alerts.
Prerequisites
- Windows Server or Windows operating system
- PowerShell
- Service account with appropriate permissions
- Script for software installation monitoring
Step-by-Step Guide
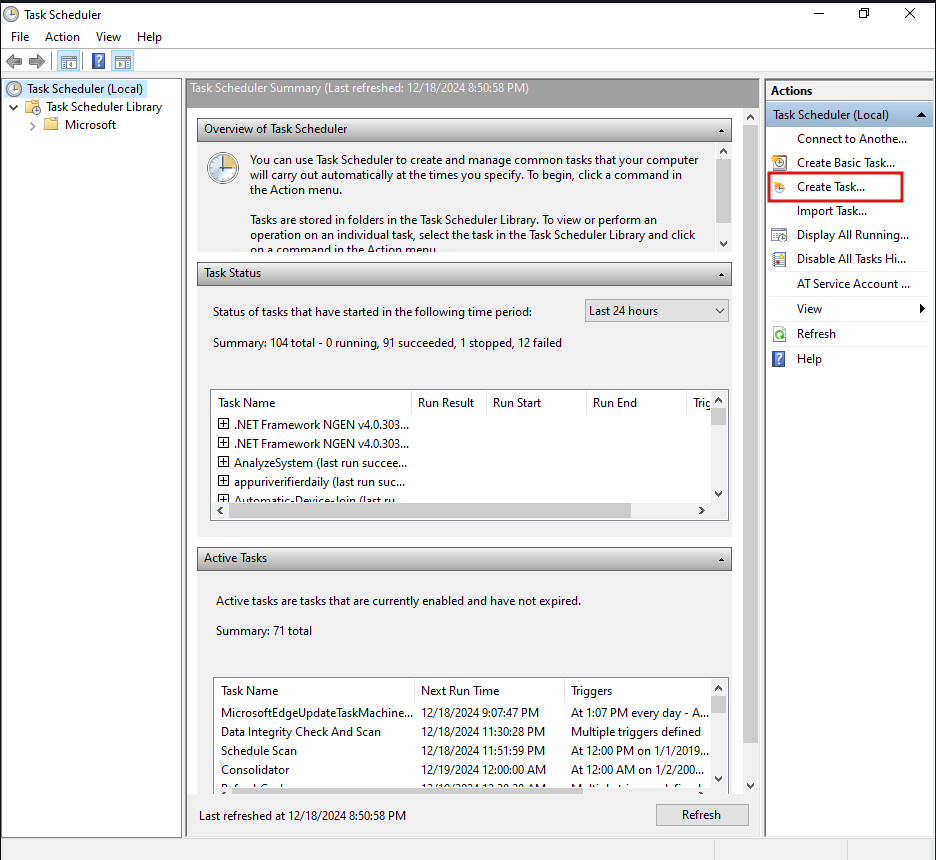
1. Open Task Scheduler
There are two ways to launch Task Scheduler:
- Press
Windows+R - Type
taskschd.msc - Press Enter
2. Create a New Task
we will create a new task that monitors software installations.
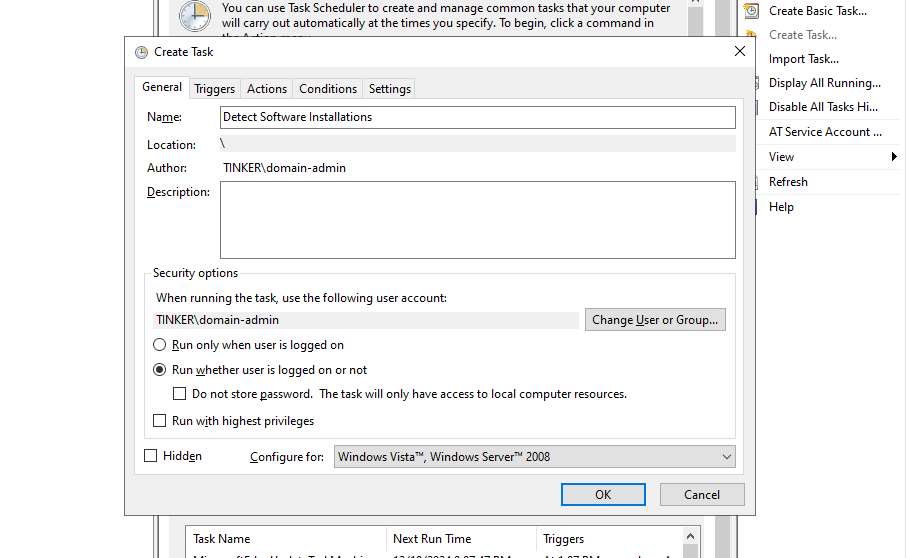
Task Configuration
- Click Create a Task
- Provide a descriptive name and optional description
- Advanced Options:
- Check “Run with highest privileges” if needed
- Configure to run with a specific service account
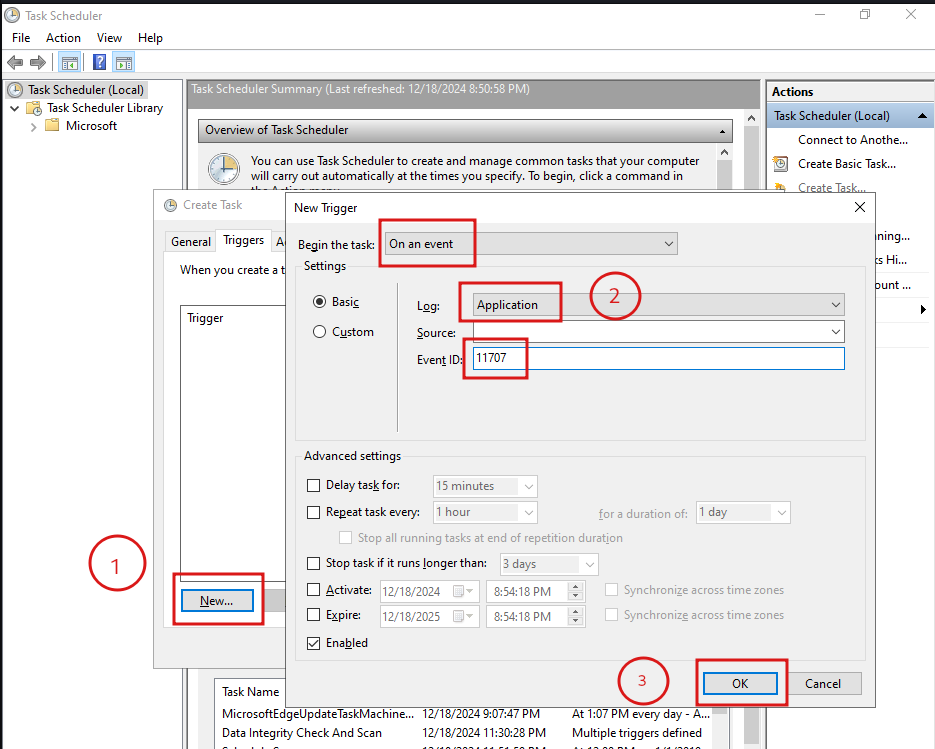
3. Configure Trigger Conditions
Navigate to the Triggers tab and click New…
Trigger Types
- Schedule-based execution
- System events (logon, startup)
- Specific event log triggers
In This Example: Monitor new software installations
- Log: Application
- Event ID: 11707
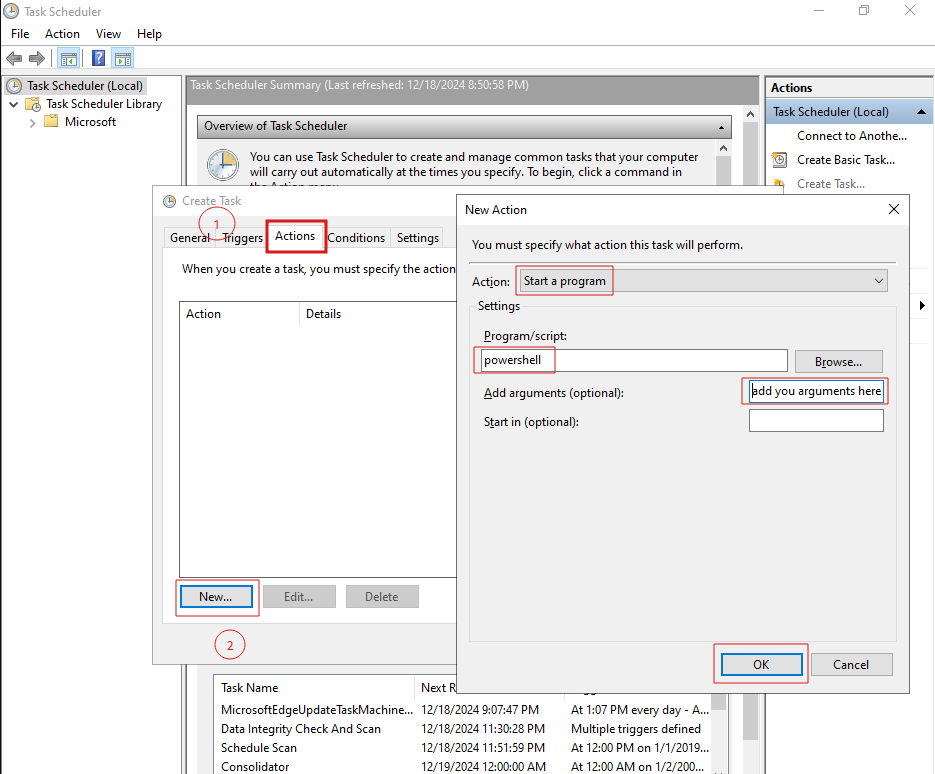
4. Define Task Actions
Go to the Actions tab and click New…
PowerShell Script Execution
- Action: Start a program
- Program/Script:
powershell - Arguments:
-File [full path to your script]
Example:
-File C:\Scripts\SoftwareInstallAlert.ps1
5. Set Conditional Parameters
Conditions Tab
- Default settings typically work well
- Can restrict task based on:
- Computer idle state
- Power availability
- Network connectivity
6. Configure Additional Settings
Settings Tab
- Configure retry options
- Set task priority
- Define what happens if task fails
7. Authentication
- Enter service account credentials
- Ensure account has “Log on as Batch Job” right
8. Verify Task Scheduler Service
Open services.msc
- Locate Task Scheduler service
- Set startup type to Automatic
- Ensure service is running
Best Practices
- Use least-privilege service accounts
- Implement error handling in scripts
- Regularly review and update scheduled tasks
- Log task execution and errors
Troubleshooting
Common Issues
- Incorrect file paths
- Insufficient permissions
- Misconfigured triggers
Diagnostic Steps
- Check Event Viewer for specific error messages
- Verify script execution outside of Task Scheduler
- Validate service account permissions
Managing Scheduled Tasks
Modify Existing Tasks
- Right-click task
- Select Properties
- Edit required settings
Delete Tasks
- Right-click task
- Select Delete
- Confirm action
Security Considerations
- Avoid storing credentials in scripts
- Use Windows credential management
- Implement principle of least privilege
- Regularly audit scheduled tasks
Conclusion
Windows Task Scheduler provides robust automation capabilities. By following these steps, you can create powerful, event-driven scripts that enhance system monitoring and management.